|
We have two photo walls in our home. One is filled with wedding photos of our family members, and the other is filled with our favorite current photos of our nieces & nephews. My sister just had a baby, so in the process of expanding our frame collection from 6 to 7, I decided to start over.
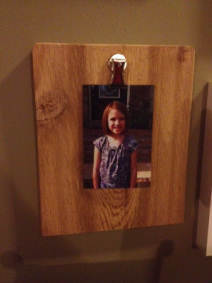
I had pinned an awesome DIY photo frame project from Love Grows Wild, and decided to see if Shane would help me with a version that fit our style & decor. Our home is cedar, and even the interior has cedar trim and cedar railings, so I chose cedar for the wood. We chose to make the rough side face the front for this project. Shane cut the pieces for me, and we both did some of the sanding for the sides & corners. I had never sanded with a belt sander, so that was a fun confidence builder for me. I installed the thingey on the back that you use to hang the frame on the wall, and I also screwed the clip in. I had lots of supervision from Shane, though, so don't worry too much. It looks beautiful on my wall, and even more lovely holding a photo of one of our littles. We have some ideas we still want to try out, so I'm going to sit tight with this prototype before I replace all of them. I'll share the final result with you when it's ready (here it is!).
1 Comment
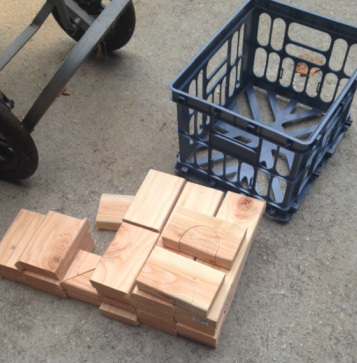
I came home to this today. Shane had power tools going full bore in his workshop (which is also the driveway). He was cutting wooden blocks to fit the milk crate I had acquired. Apparently the cutting is the "easy" part, but the next million phases involve sanding using different grits of sand paper until the blocks are gentle enough for the play of children. We all know that kiddies are going to chew on these while they poke one another, and a splinter is not an option.
This is the second set Shane has made. The first set was a request from his sister, and was delivered for the holidays a few years ago. Once the sanding happens, I'll post an update (and here it is)! |


 RSS Feed
